Table of Contents
The Custom Company Report provides the highest level of flexibility when you require a blend of predefined and custom Company-specific field data. With this report, you can not only select the fields you require, but also determine the order in which these fields appear once the report is exported.
Creating a Custom Company Report #
- Click “Reports” on the main toolbar.
- Click on the “Manage Custom Reports” action icon.
- Click on the “Custom Company Reports” tab.
- Click the “Add” button to create a new report.
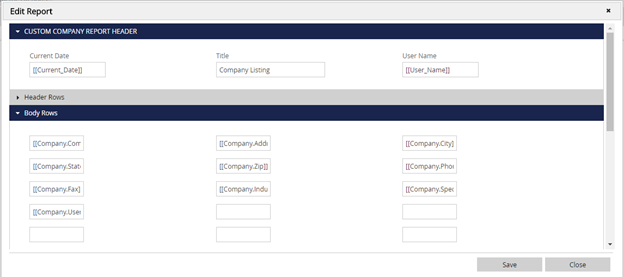
- In the “Custom Company Report Header” section, replace the placeholder [[Report Title]] with your desired report name.
- Choose fields for inclusion in the Body Rows section:
- Click on the first cell and select the field you want to include in your report.
- Continue selecting fields from left to right and row by row. You can choose up to 24 fields, giving you control over the data to be displayed.
- Customize Header Rows:
- As you select a field, the field name will populate the Header Row cells. For example, you can change the header from “Company_Name” to “Client.”
- Use Field Groups (Optional)
- In the “Field Groups” section, you can display a list of unique values for the selected field and a count of records with each unique value. For example, in this area you can select State field to show a breakdown of the number of records included in the report for each unique state.
- Include Totals (Optional)
- In the “Totals” area, you can include a count of how many records contain data in the selected field. For example, you can include Company Name to count the number of companies included in the report since all companies have a value.
- Save your Custom Company Report:
- Once you’ve made all your selections and configured your report to your satisfaction, click “Save.” Your custom report will be accessible in the “Company Reports” section under the Reports menu.
Generating a Custom Company Report #
- Click on “Reports” in the main menu.
- Navigate to “Company Reports.”
- Choose the specific report by clicking on its name.
- Limit your report by either Name Rollup or Date Entered.
- Use the Order By dropdown to select the field for sorting, and specify whether it should be in ascending or descending order.
- Access the action menu and opt for your desired export format (Note: Export options beyond PDF View Mode depend on your Export Reports security settings).