Many interface elements and concepts are repeated throughout the system. Once you have become familiar with these areas and behaviors, you will find navigation becomes intuitive.
Overall Screen Areas #
After logging into the system, you will find three general areas of the interface:
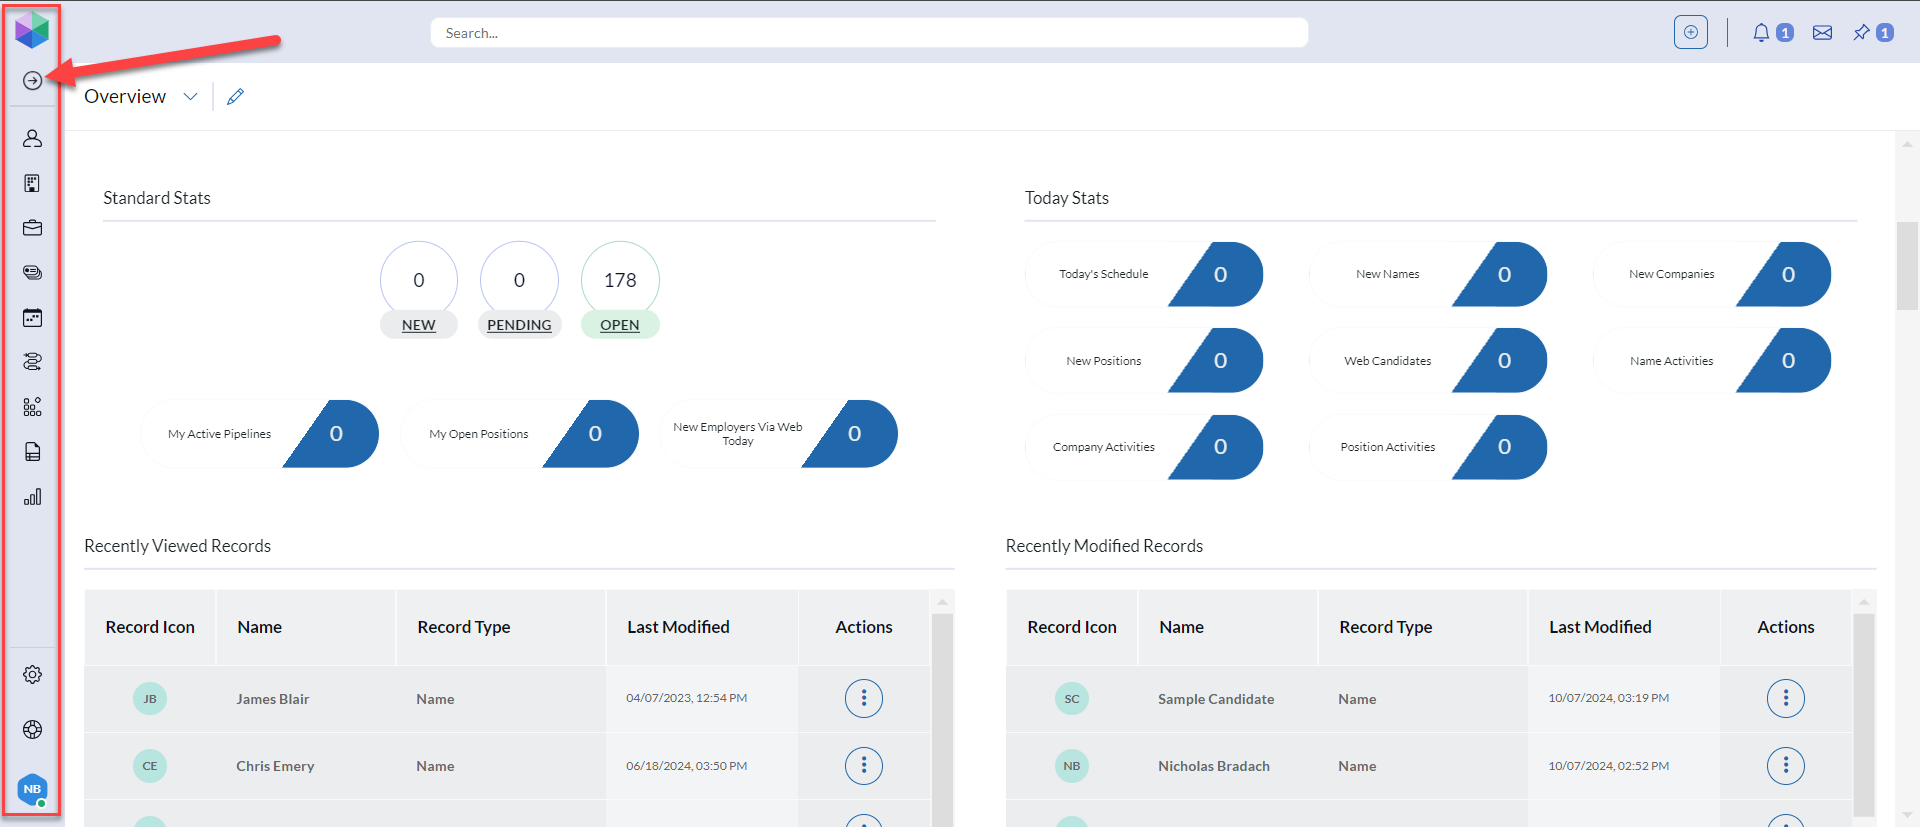
- Main Menu
- Down the left side of your screen, you will find the primary navigation menu, which provides access to key areas and features.
- By default, only the icons are shown to maximize screen space, however you may see the labels by using the ‘Expand Menu’ arrow at the top of the column, or by hovering your mouse over any icon.
- The bottom of this column includes the Settings areas, a link to the helpdesk, and your User Menu.
- The User Menu contains the following options.
- Switch Mode: This allows the user to switch between light and dark mode in the software. (Dark Mode Coming Soon!)
- User Security: Allows user to change their password.
- User Preferences: Allows user to set their prefered Dial Method and add a Profile image.
- View background tasks: Shows Current and Past Email Campaigns.
- Start Launcher: PCR legacy feature, this can be ignored.
- Update Notices: Takes user to the PCRecruiter blog.
- Learning Center: Navigates the user to the Learning Center.
- Logout: Logs user out of PCR.

- Top Bar
- The upper area of the screen contains the Search box, from which both Quick Search and AI Search are accessed.
- It also contains the Add Records button.
- The far top right corner contains the Notifications area, access to the system’s built-in email client, and your Pinned records.
- Content Area
- The majority of the screen is dedicated to the content area, which displays your data.
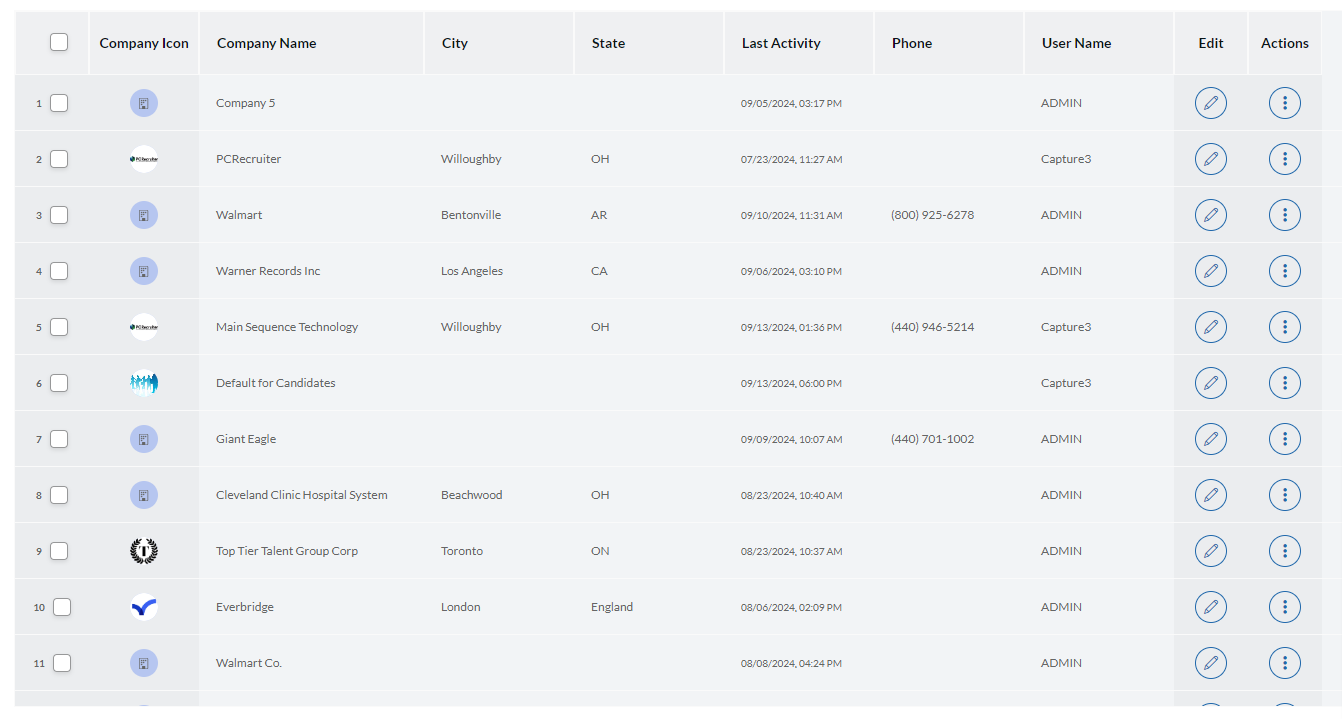
Grids #
Whenever you are working with a list of records, such as Names, Companies, Positions, or Rollups, you will be using a Grid.
Grids are interactive tables of data which include rows for each record, and columns for each value within that record. Some columns will also contain actions, indicated by circles.
Pinning #
To save time while working, you can temporarily hold important records for easy access. For example, while sifting through potential candidates, you may want to save records of interest for further consideration, or you may wish to keep the Position you are trying to fill and the contacts you plan to call easily at hand.
The Pin feature helps with all of these tasks. It appears in the Action menu and Dashboard panels for all Name, Company, and Position records.
Pinning Records #
- From Record Grids: When viewing a Rollup or Search result list, look within the Action menu (three dots) to find the Pin Record option.
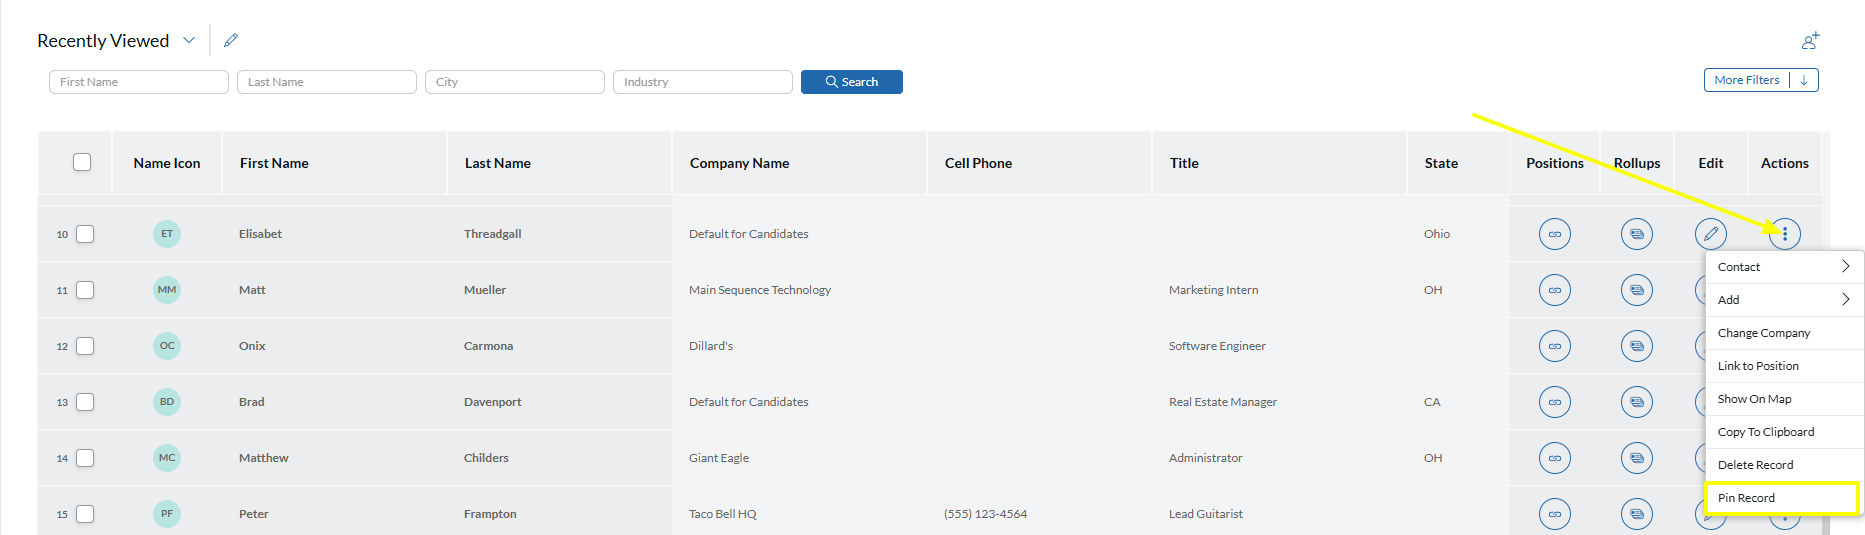
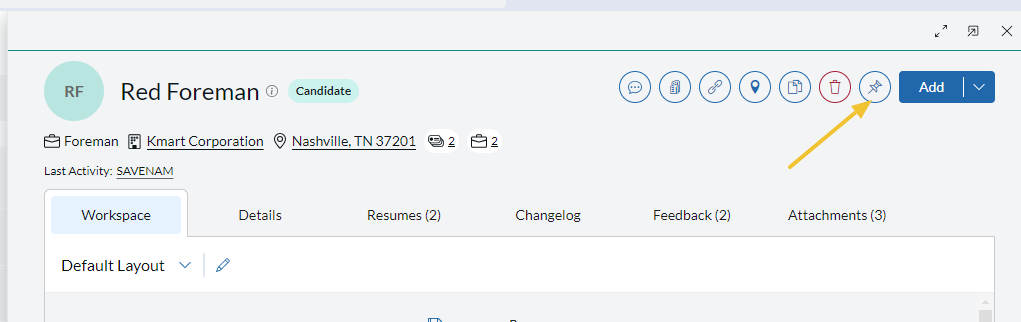
- From Records: The Pin icon appears at the top right corner of the Name, Company, and Position record views.
Viewing Pinned Records #
Pinned records are accessed from the pushpin icon at the top right corner of the screen. If records have been pinned, a badge will appear on the button to indicate the number of currently pinned records.

- Click the button to expand the bar, displaying the currently pinned items.
- Click on any pinned item to load that record below.
- To un-pin any record, mouse over it and click the ‘x’.
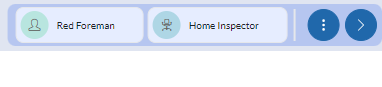
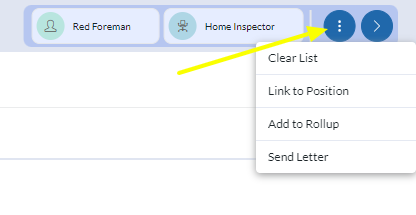
An Action menu (three dots) appears within this pin area. It allows you to:
- Clear List: Un-pin all currently pinned records.
- Link to Position: Attach all pinned Names to a Pipeline.
- Add to Rollup: Attach all pinned records to a Rollup List.
- Send Letter: Open an email including the pinned Names in the To: field.