Table of Contents
There are two options for accessing the Placement screen to Place your Contractor on Assignment. Both of these screens are accessed by first going to the Position Pipeline:
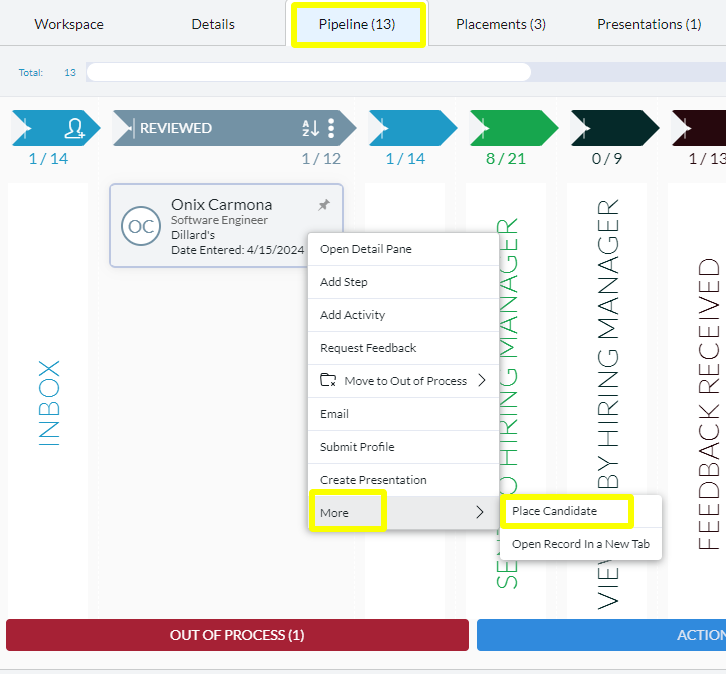
Adding a Single Placement #
- Select the Position you will be making the Placement for
- Click Pipeline from the Navigation Toolbar
- Right click on the Candidate’s Record Card
- From the menu, select ‘More‘ and then ‘Place Candidate‘
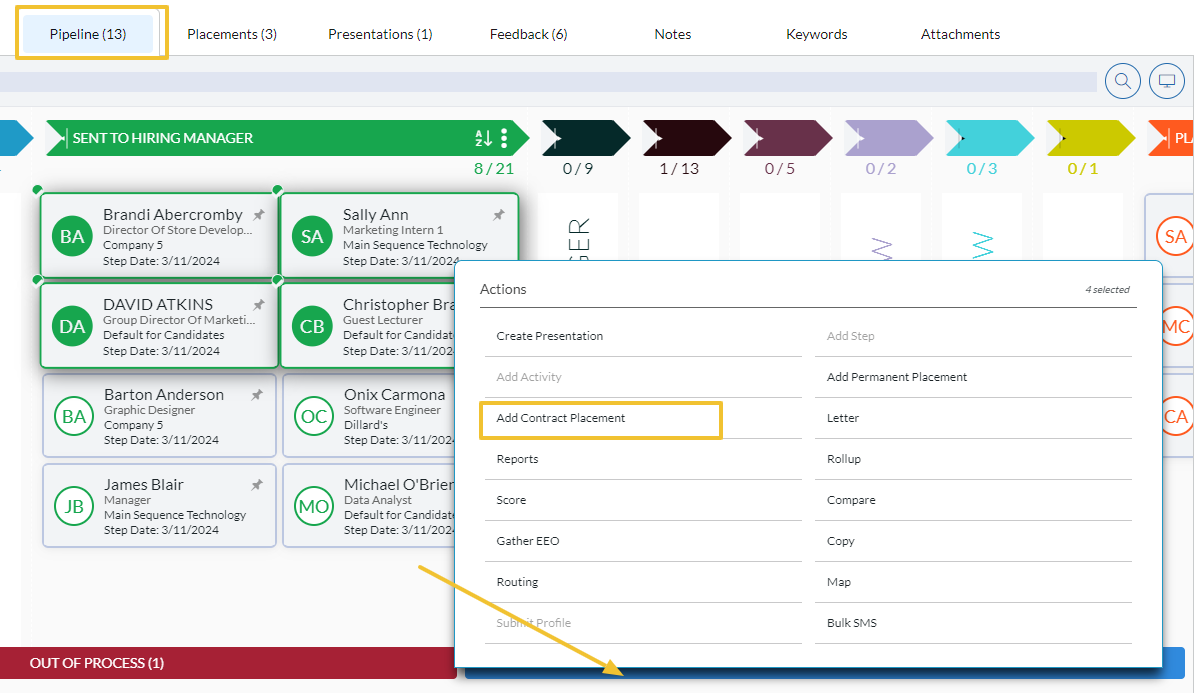
Placing Multiple Candidates #
This method allows for adding multiple Contractors on Assignment at once.
- Select the Position you will be making the Placement for
- Click Pipeline from the Navigation Toolbar
- Select the record(s) you wish to Place
- Click Add Contract Placement from the Action Menu
Once you have accessed the Placement screen via either of these options you will need to complete the details.
Placement Details #
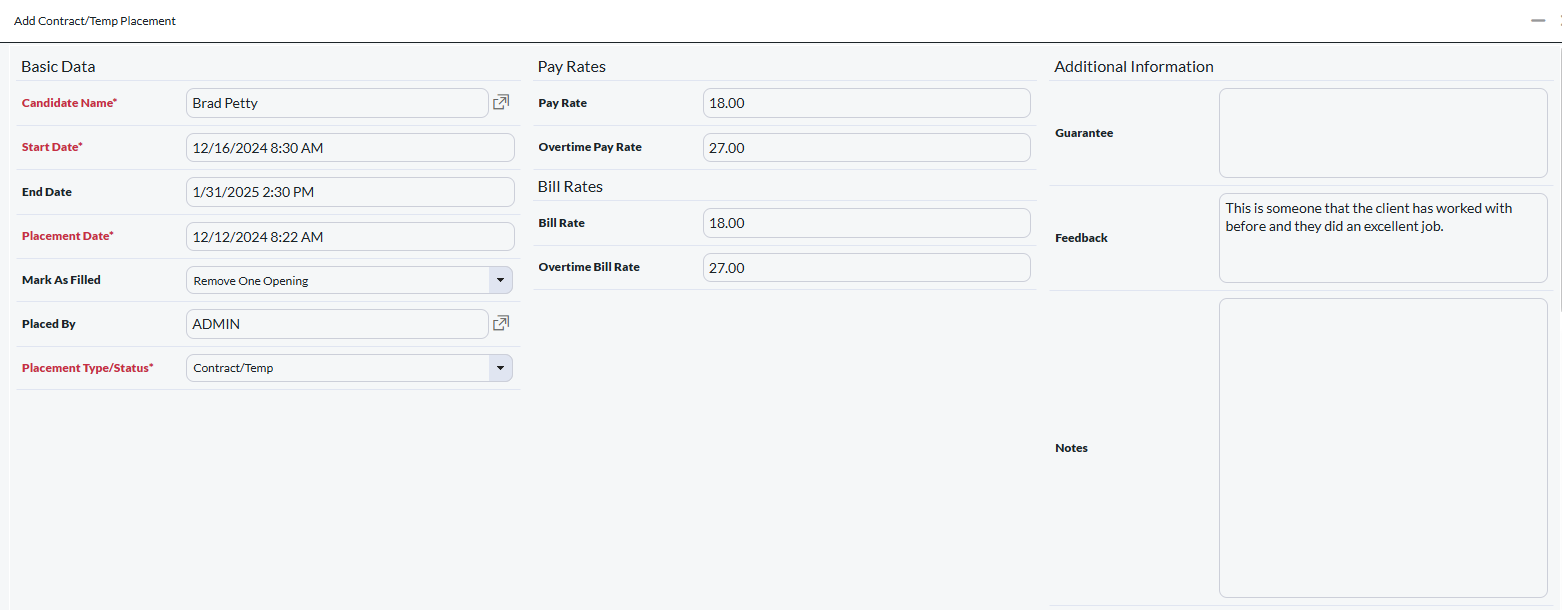
Basic Data #
- Name: Click the popup selector to the right of this field to display a list of all Candidates in the Pipeline to Place. You can also use the search box to search your entire database. This will search by Last Name, First Name
- Start Date: Use the calendar picker to choose the Start date/time for this Assignment. The default is the current date
- End Date: Use the calendar picker to choose the End Date/Time for this Assignment, or leave it open ended by choosing No End Date. The default is No End Date.
- Placement Date: Select when this Assignment was arranged via the Calendar Picker
- Mark as Filled: This field will allow the number of openings to decrease on the position record. When this number reaches zero it will close out the job by marking the status as ‘Filled’
- Placed By: The default is the current user that is logged in, but by clicking the popup selector to the right of the field, you can select another user to be credited for the placement. (If you are using Splitdesk, this is the username that will receive 100% credit unless edited)
- Placement Type/Status: This field can be used to specify a placement in PCRecruiter using placement codes
Pay Rates #
- Pay Rate: Contractor’s base pay rate.
- Overtime Pay Rate: Contractor’s overtime pay rate.
- Bill Rate: Contractor’s base Bill rate.
- Overtime Bill Rate: Contractor’s overtime bill rate.
Additional Information #
- Guarantee: This field is used to put details about the guarantee
- Feedback: This field is for internal or external feedback on the candidate being placed.
- Notes: Relevant additional information to the placement can be put here.
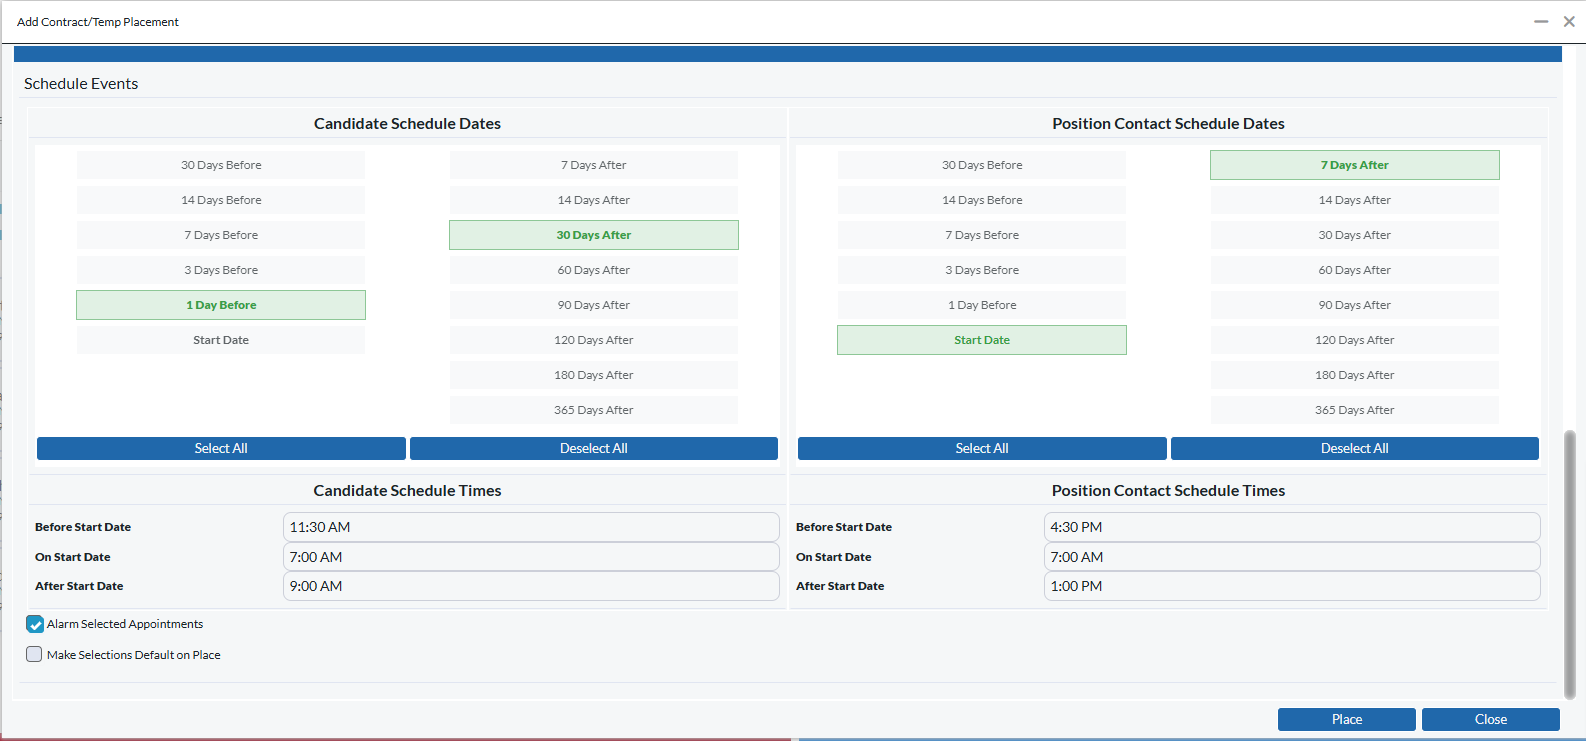
Scheduling #
- Candidate Schedule: The upper portion of this window will mark items on your calendar to reach out to the Contractor. Options range from 30 days prior to the start date of the Contractor up until one year after the start date. Three clock dropdowns will give the choice as to when these items will be placed on your schedule. The first is for items placed before the start date. The second is designed for the start date while the third is meant for items only after the start date.
- Position Contact Schedule: The lower portion of this window will mark items on your calendar to reach out to the Contact on the Position. Options range from 30 days prior to the start date of the Contractor up until one year after the start date. Three clock dropdowns will give the choice as to when these items will be placed on your schedule. The first is for items placed before the start date. The second is designed for the start date while the third is meant for items only after the start date.
Temp to Perm #
The Temp to Perm feature allows you to create a new permanent placement for a position from a contract placement. This too would be used, for instance, if a Company has decided to hire a contractor on permanently either during or at the end of their contract.
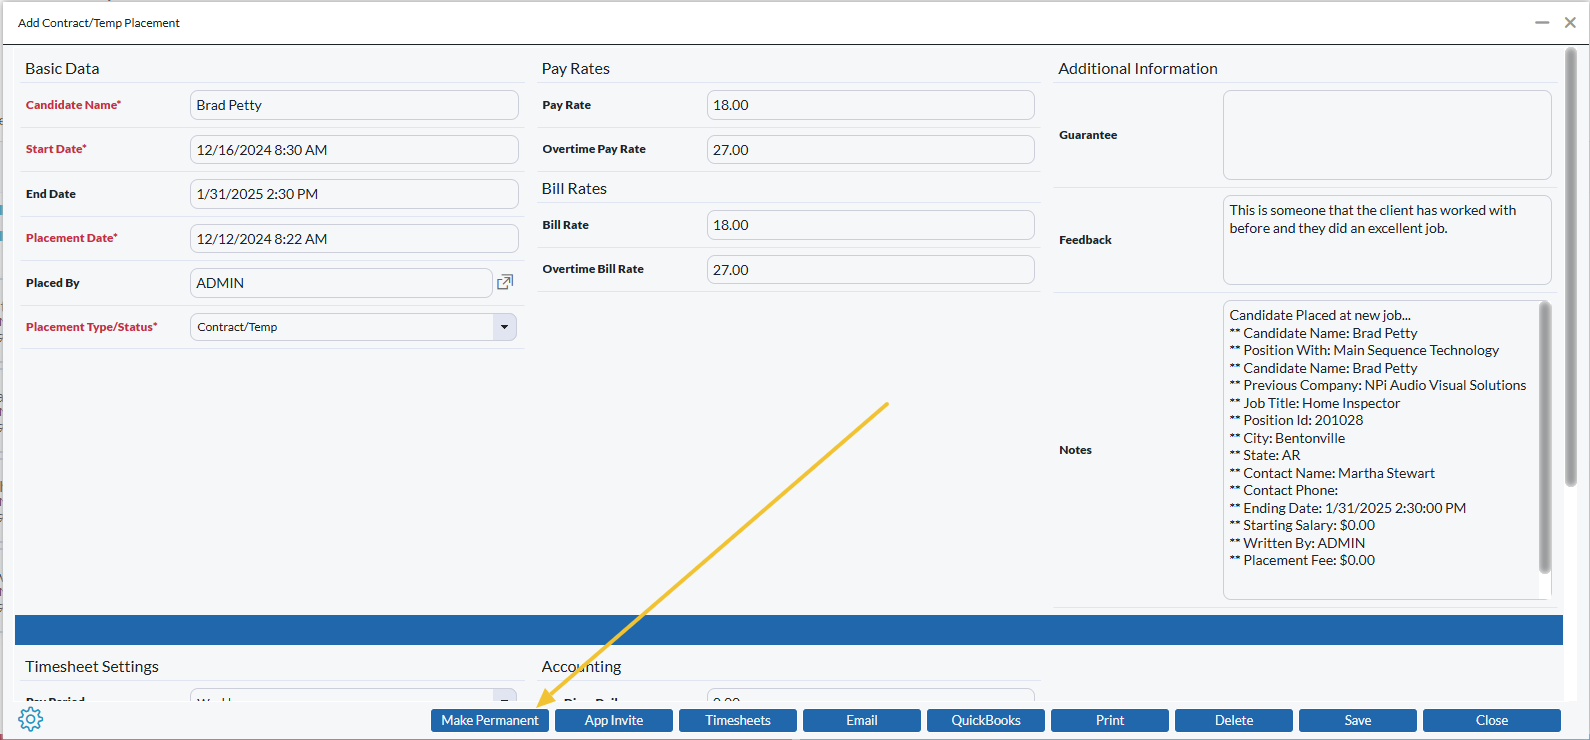
Making a Contractor Permanent #
- Select the Position in which the Contractor is currently on Assignment. (Can also access this from the positions tab on a name record.)
- Select the Pipeline tab from the Navigation Toolbar.
- Right click on the Placement and hover over more, click view placement from the menu.
- Choose Make Permanent located at the bottom of the placement.
- Enter Permanent Placement details (Click HERE for more details regarding Permanent Placement fields).
- Select Place when finished