Bulk Importing Lists of Records #
Adding records can also be done by importing a CSV or MDB file. This allows the user to bring in large amounts of records without needing to manually add each one. Please note that CSV files have a limit of 255 characters that can be imported at a time. If you need to import more than 255 characters an MDB file must be used.
WARNING: Bulk Imports cannot be undone without a data restore, which is a billable expense. For tips and FAQs on Bulk Importing click HERE or reach out to our Support Department for assistance.
To import a list navigate to the Add Record screen and follow these instructions:
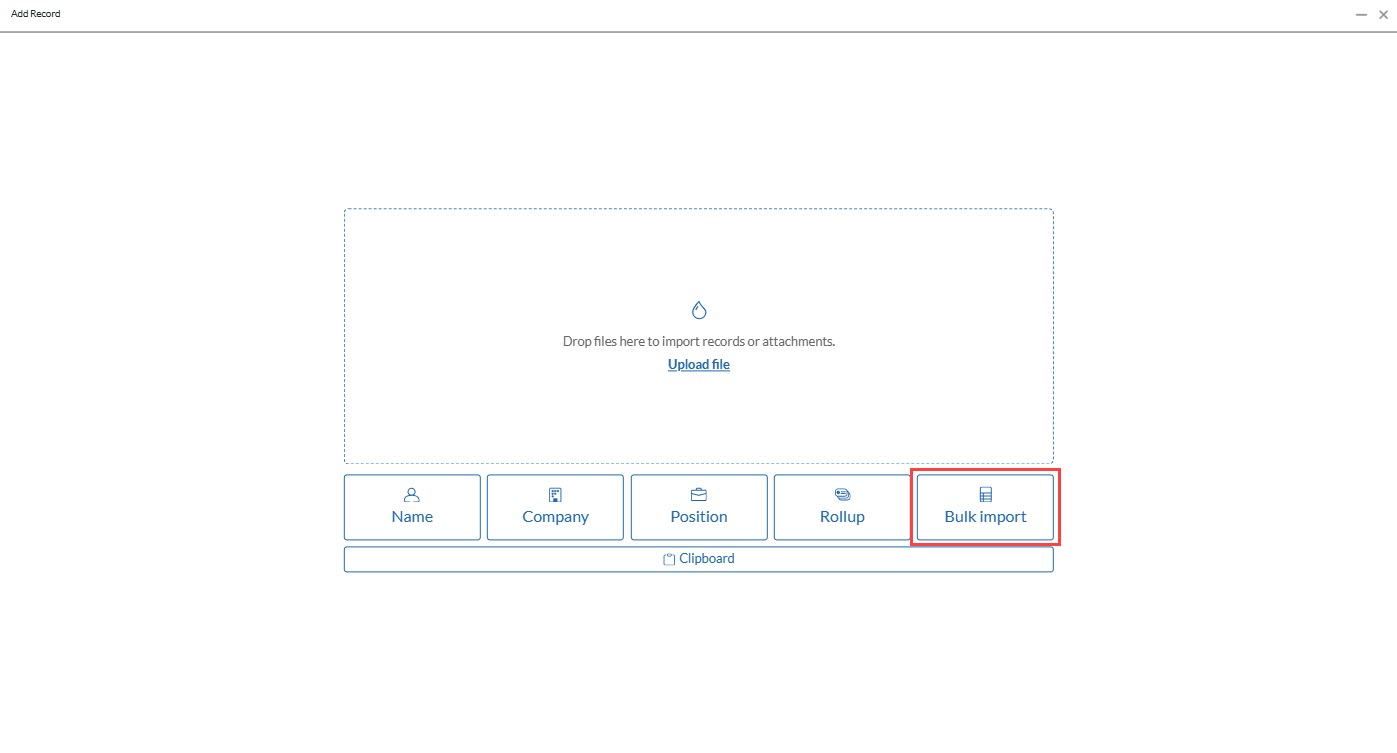
- Select Bulk Import from the Add Record window.
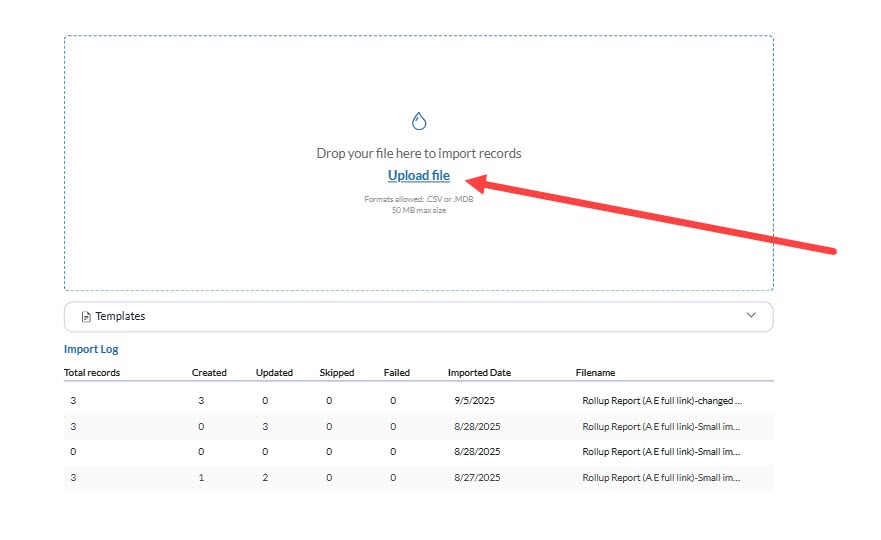
- Click Upload File or drag and Drop the CSV or MDB file you want to import. (50 MB is the max file size for a bulk import)
- Select the Record Type you are importing and click Upload.
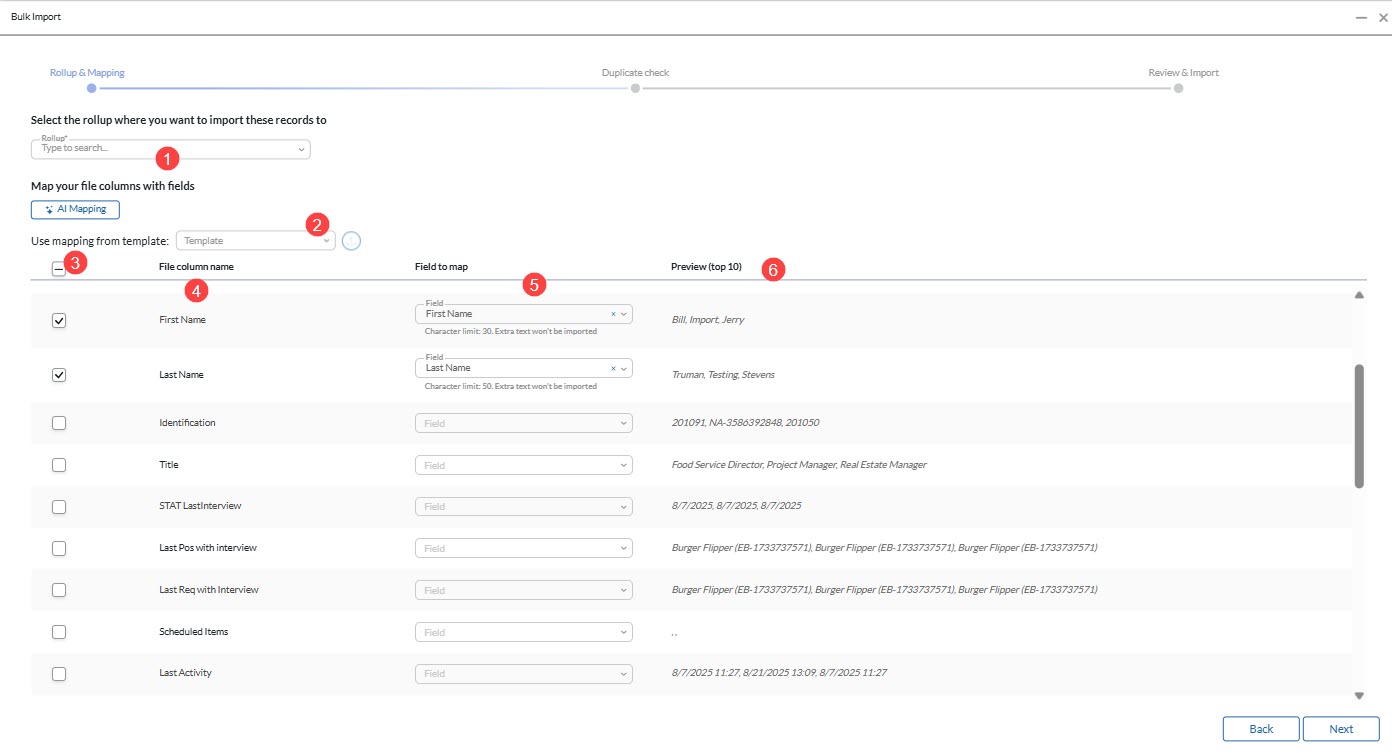
- The first step of the import is the Rollup and Mapping screen. This screen will vary slightly based on the record type you are importing. The exmaple below shows a Name record bulk import.
- Select the Rollup List you want to import the records to. If you want to create a new Rollup type any name that does not already exist in your database and a new Rollup will be created during the import.
- If you have imported records previously you can select your Mapping Template here. Select the Template from the dropdown and click the upload button to autofill your previous selections. (This is usful when importing multiple files with the same or similar data structure.)
- The check boxes on the left indiciate which columns you want to import. Information in columns left unchecked will not be added to your database.
- This is the Name of the column found within your file.
- This dropdown lists all the fields from in your database that you can upload data to. Please note that the field must already exist within your database for the data to be imported.
- This columns shows a preview of thw top 10 values under that column header to ensure you are mapping the columns from your import to the correct fields within the database.
- Once you all selections have been completed, click the next button to move to the Duplicate Checking Screen.
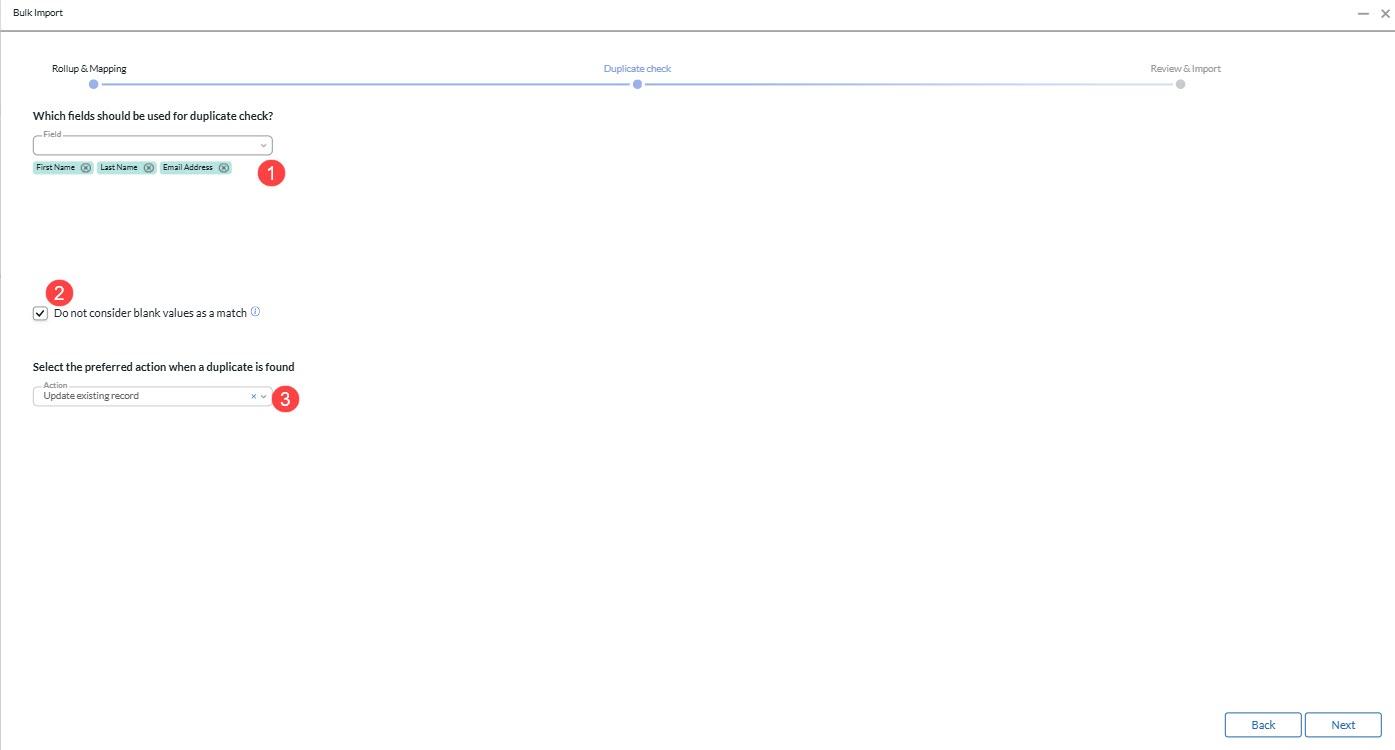
- The Duplicate Checking screen allows you to set the criteria the system will use to determine if a record you are uploading already exists within your database. This step is important as it helps to ensure database cleanliness. It can also be useful to update records that have outdated information.
- Select from the available fields in the dropdown to add them to the duplicate checking criteria. Please note that the system will use all of the fields selected so it is always recommended to utilize unique values, such as Email Address. (For tips on Bulk Importing click HERE)
- Checking this box will prevent blank values from being counted as duplicates. Unchecking this box can cause incorrect duplicates to be identified if blank values exist within your database or the file you are uploading. It is always recommended to leave this box checked when doing a Bulk Import.
- Select the preferred action when a duplicate is found. Update Existing Record will update the duplicate record with the data in your file, overwiritng any existing values. Skip when duplicate found will leave the existing record alone and no data will be imported. If no duplicate is found a brand new record will be created.
- Click next when finished to move to the Review and Import Screen.
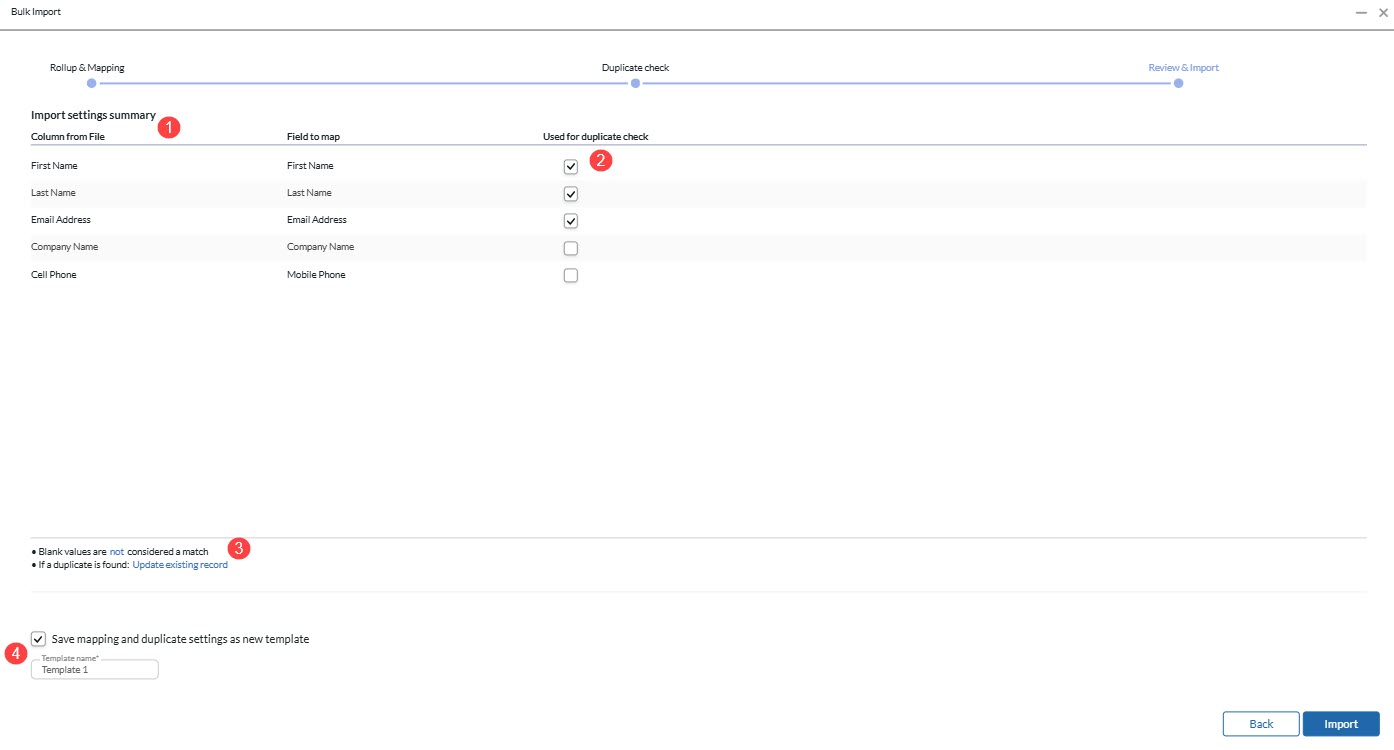
- The review and Import Screen is the final step of the process before importing your records. make sure to double check all the selections made to ensure your data is imported correctly.
- The Import Settings Summary will show you all of the Column Titles from your file and the correspinding fields in the database that these values will be imported to.
- The Used for duplicate check column will have the fields you selected to use for your duplicate checking criteria. You can also select or deselect them here as needed.
- This will show the duplicating checking behavior you selected.
- If you will be importing additional lists in the future with identical or similar table structure, check this box to save the mapping template. This will save you time in future imports by autofilling your column selection and duplicate checking criteria.
- Once you are finished click import to upload the records to your database.
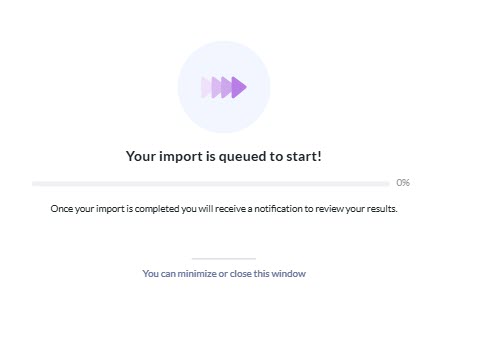
- A window will open with a progress bar while your import completes. You can minimize or close the window during the import and continue working. (NOTIFICATION HERE?)
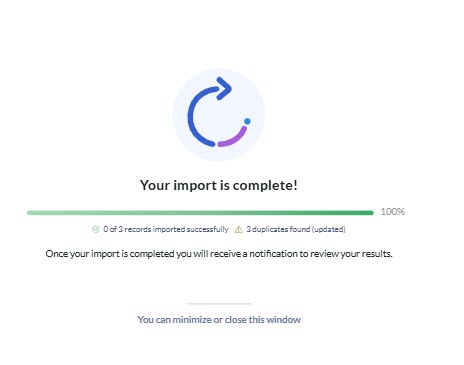
- Once it has finished you will see the results of the import, which will display the count of any new records created, duplicate records updated or skipped, and errors that occurred during the import.
- After completing an import you will be able to see these counts in the import log by returning to the Bulk Import file selection screen.
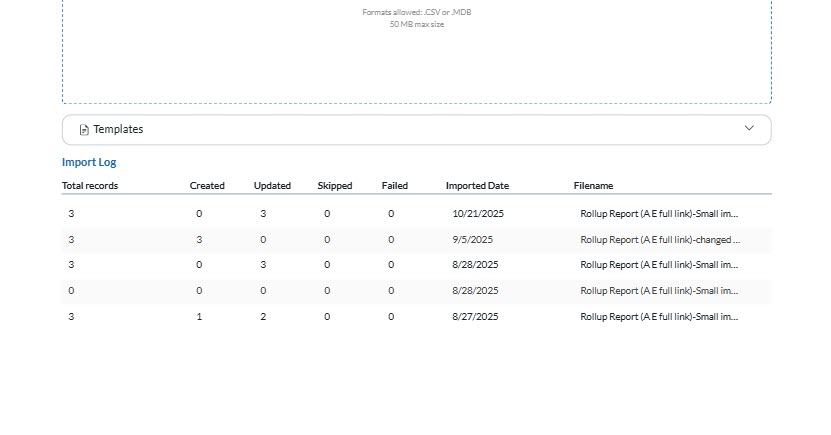
- From here you can also click the dropdown arrow to view the templates you have saved.
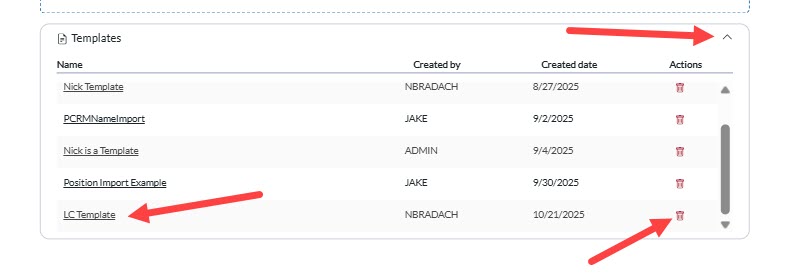
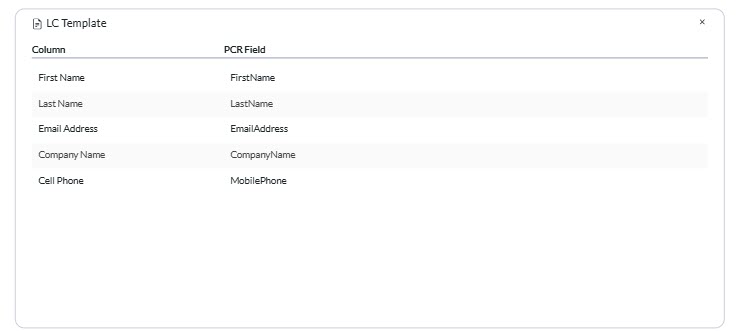
- You can see the Tamplet name, the user who created it, and the date it was created. Click on the tempate name to view the template details or click the trash icon to delete the template.
AI Mapping Feature #
The Bulk Import tool contains an AI Mapping feature which can reduce the tedious process of manually selecting every single column you want to import to. The system will send the list of column titles along with all of your predefined and custom fields and attempt to match them to the corresponding fields in your database. This can be done from the Rollup and Mapping screen.
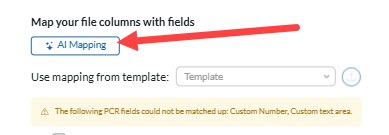
- From the Rollup and Mapping screen click the AI Mapping button to prompt AI Matching tool.
- Once the tool is finished you will see the field names displayed in the dropdown on the righthand side.
- Any fields that could not be matched will listed in the warning message displayed and the checkbex on the left will remain unselected.
- It is important to always double check these selections as each database is unique and the AI Tool does not know the type of data that is meant for the specific fields in your databases.
- Select any remaining fields or adjust the existing selections and proceed with the remaining steps to complete your import.
Bulk Import Tips and FAQs #
While Bulk Importing records can be extremely useful for adding or updating large amounts of records, it can also cause issues with data integrity by creatin unnecessary duplicates or updating records with incorrect information. The following are tips from our support team to ensure that your import runs smoothly and your data remains accurate and clean when using the Bulk Import tool. If you have additional questions or would like assistance please reach out to our Support Team for assistance with the Bulk Import process.
- Different record Types: All three record types have their own unique behaviors which need to be considered during the import process.
- Position Records require the user to select a Pipeline Template for newly imported Positions records. (Existing Position’s Pipeline templates will not be changed.)
- Name records have the option to select Company Name, Company City, Company State, and Company Phone. If that Company does not exist within your database a new Company will be created using those fields. If the Company does exist with the matching values, then no record will be created .
- Duplicate checking: Identifying existing records in your database is an essential part of the Bulk Import process. It is crucial that the correct criteria is selected in order to perserve your data and prevent duplicate records from junking up your database. Here are a few things to note when selecting your duplicate checking criteria.
- It is always best to select values that are unique to as many candidates as possible to prevent the wrong records from being updated. Some recommendations on criteria to use are listed below.
- First Name, Last Name, Email Address
- First Name, Last Name, Linkedin URL (or any social network link)
- First Name, Last Name, Phone Number
- First name, Last name, Company Name
- First name, Last name, City, State
- It is recommended to use between 2-4 fields at a time as using too many fields can also cause the system to miss existing records with missing or incomplete values. Please note that other criteria may be used as each import is unique.
- Do not include columns with lots of blank values in your duplicate checking criteria. This is also why it is importing to leave the “Do not consider blank values as a match” checkbox selected.
- Be cautious of common names, such as Mary Smith, that may exist in the database multiple times. Two identical common names can be identified as duplicates if a unique value, such as Email Address, is not utilized.
- It is always best to select values that are unique to as many candidates as possible to prevent the wrong records from being updated. Some recommendations on criteria to use are listed below.
- Prepping your spreadsheet: Prior to using the import tool it is always recommended to review the data you will be importing.
- If you have large number of blank values or inconsistent data formatting this can cause issues during the import process.
- Make sure your columns have names that are similar to the field names in your database to prevent mistakenly mapping a column to the wrong field.
- Do not import columns with multiple values in the same column, such as email address or phone number, make sure to split these into multiple columns.
- States should be imported using the proper 2 letter abbreviation. If they are not use the find and replace function to standardize these prior to performing your import.
- Remove unecessary columns from your list to prevent confusion when selecting the proper fields to map the data to.
- File Types; There are 2 file types that can be imported, CSV and MDB, which are used for different purposes. We recommend using a software like Microsoft Access when importing MDB files.
- CSV files have a 255 character limit, which is sufficient for most basic imports, however if you are importing Job Descriptions or Summaries that have more than 255 characters you will need to use an MDB file. Any characters over the limit will not be imported, leaving you with incomplete data.
Bulk Import FAQs #
- Q: I’ve imported a file and cannot find the records I imported.
- Q: How can I tell what data was updated on an existing record from an import?
- A: The Change Log on a record will show any values that have been updated. Additionally, the activity text of the IMPORT activity will list all the fields updated during the import.
- Q: I am not sure what file type to use for my import.
- A: Most imports can be done using a CSV file format, however, any import that has values with over 255 characters MUST be done with a MDB file.
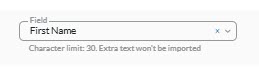
- Q: How do I know the character limit for a field when importing?
- A: The import tool will list the character limit once the field has been selected from the dropdown. Any additional characters will be cut off during the import.
- Q: What happens with the Company data I included with the Name record import?
- A: Companies that do not exist within the system will be added as a new Company record using the values imported from your spreadsheet. If the Company already exists the Name record will be assigned to that existing Company record. No Company data will be updated during a Name record import, these values are only used for duplicate checking or to create a new Company record.
- Q: What if both the Name and Company records already exist in PCR?
- Q: What happens for an existing Position if the Pipeline Template is different than the one I select?
- A: The existing Position record’s field information will be updated but the Pipeline Template will remain the same.