The workspace tab is a customizable dashboard for each record type with various widgets that can be added based on the most relevant information to the user. Each record type has its own unique widgets and options that can be added to this workspace tab. This is used as a quick view of record information and will open as the default tab for all record types. Users have the option to drag and drop the different widgets for their desired layout. Currently this is individually customized by user. Please note that the configuration chosen will be a global setting for all records of that type. Below is the information for customizing each workspace broken down by record type.
Editing The Workspace Tab #
The Workspace will come with a Default View when the user is first added to the database. Clicking on the change view arrow will open the action dropdown menu which gives you the option to refresh the tab to show information that has been added (this is a manual refresh and is typically not needed as the widgets will adjust when new information is added), to reset the layout to the Default View for newly added users, and to switch between different layouts (The change view option is coming soon and currently only 1 view can be saved per username).
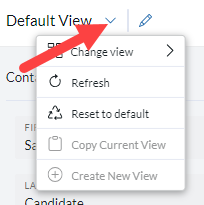
The Workspace can be edited by clicking the Pencil icon to the right of the arrow. From here the user can Rename the Layout, Save the layout, reset to the default view, and delete a specific layout (Coming soon!). Once in edit mode click on the 3 dots to open the action menu, save or cancel changes, or rename the view. To add widgets to the layout drag and drop the widget from the options to the right into the workspace area. These widgets can then be rearranged by dragging them around this area. Each widget has its own unique settings which can be configured by clicking the gear icon in the top right of the widget. Remove widgets by clicking the trash icon in the top right of the widget.

Copy Record Workspace Between Users #
Navigate to the record type of the Workspace Layout you want to copy
Select the Dropdown from the left corner of the record menu
From here, choose ‘Copy Current View’
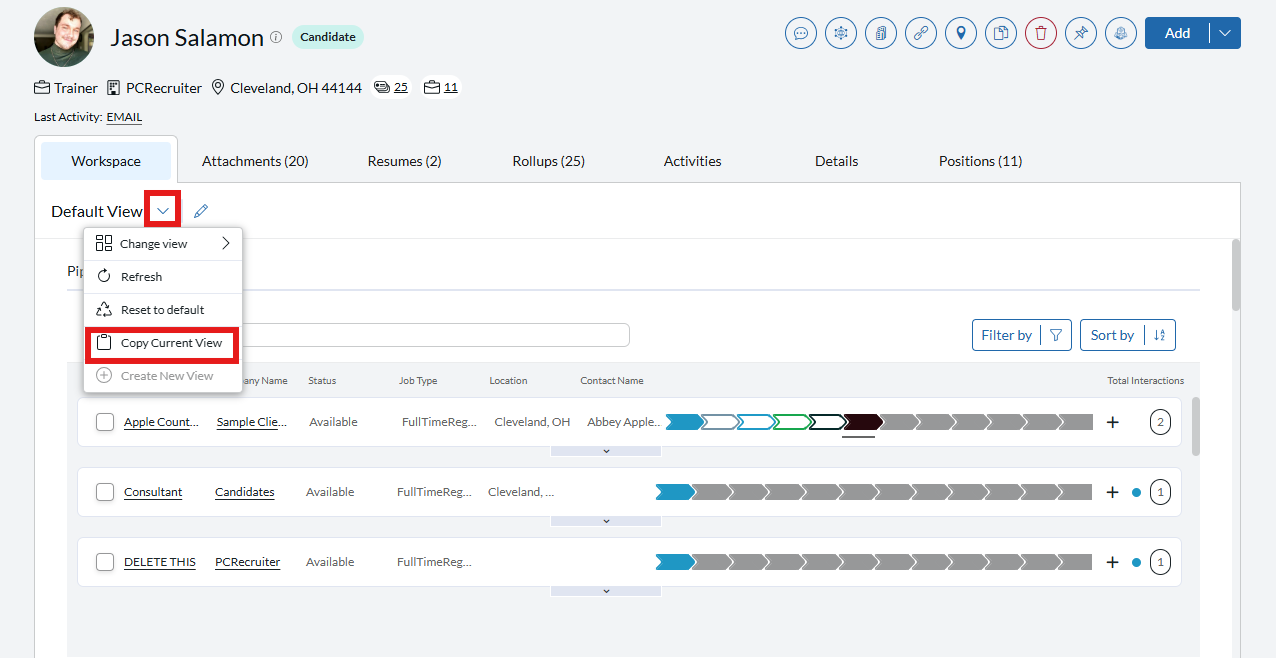
In the dropdown menu, select the user(s) you want to copy this workspace layout to. Note: The copied view will include: column order, frozen and collapsed settings.
Click the ‘Copy’ button and this layout will be applied to all selected users.

Name Records #
The Workspace tab has a number of different settings and options listed below. These are specific to the Name record tab and this configuration will be shown for all Name records in the database for each user. (Additional layout options coming soon!)
- Empty: This widget adds an empty space to your workspace which allows the user to fill in spaces on the record if desired.
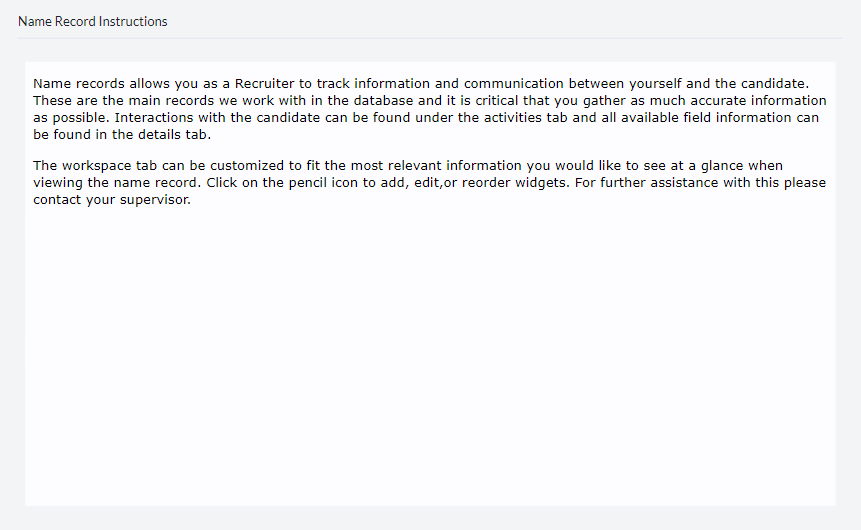
- Text/Instructions: Free text box widget which can be filled in by the user as needed. This can be helpful for giving your new users guidance on utilizing the workspace/record tabs or specific process instructions. (Note that this is different than the notes section, which is individualized for each record and can be found elsewhere in the database. This widget provides specific text to all records of that type and does not show anywhere else but the Workspace tab)
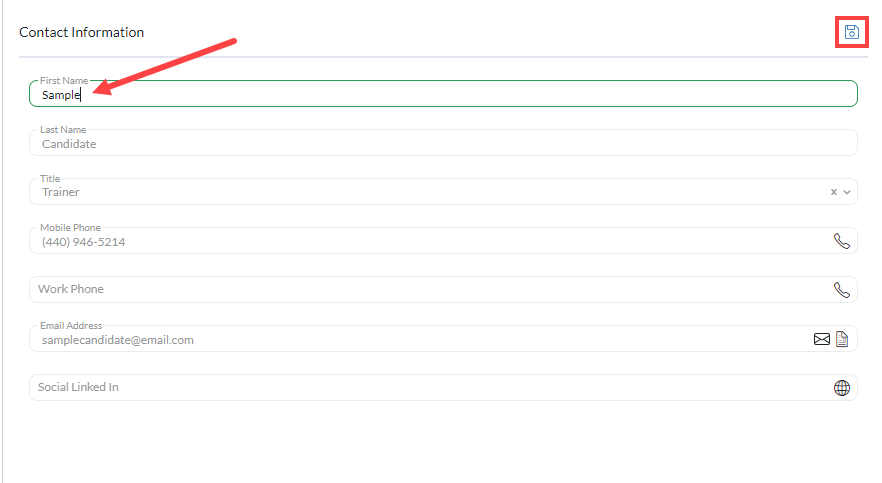
- Candidate Field List: Shows selected fields from the Name Record which are typically the most commonly used fields that can be quickly referenced or edited as needed. These fields can be reordered and configured to your specific needs. You can also rename the Field list Title to reflect the specific type of field information the widget contains, such as Location or Record Information.
- To edit the field layout, click on the gear icon in the top right of the widget and then drag the fields to reorder them, change the selected field by clicking the pencil icon, remove a field with the trash icon, or add new fields by clicking the plus icon. Field names, order, and editable values will appear in the right hand column of the window. Click the save icon when updating field information and the done icon to close this window.

- Video: This allows the user to add a video to the workspace tab via embedded URL link. When in edit mode on the Workspace tab, click on the widget’s configure icon and add the link and header to add the desired video. (Please note that the Source Type should not be adjusted as the embedded link is the only supported source type at this time.)

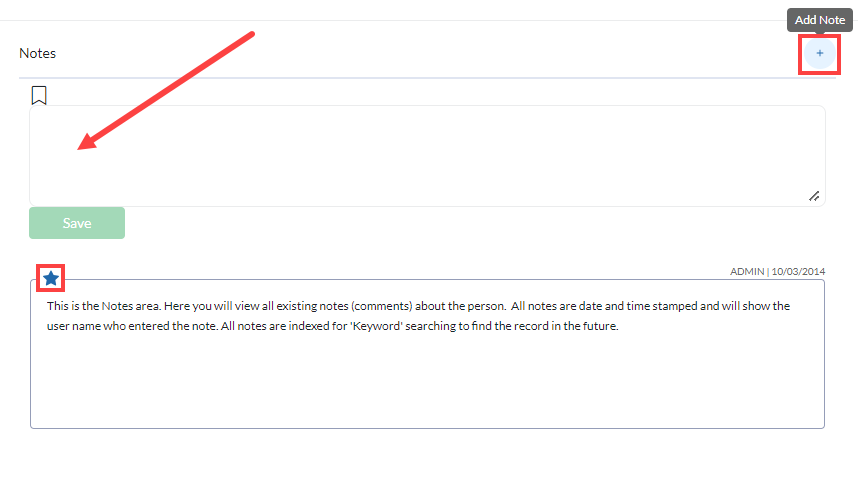
- Notes: Displays Name Record notes sorted by date. Notes can be added by clicking on the plus icon in the top right or prioritized, which pins the note to the top of the list, by clicking the star icon at the top of the note.
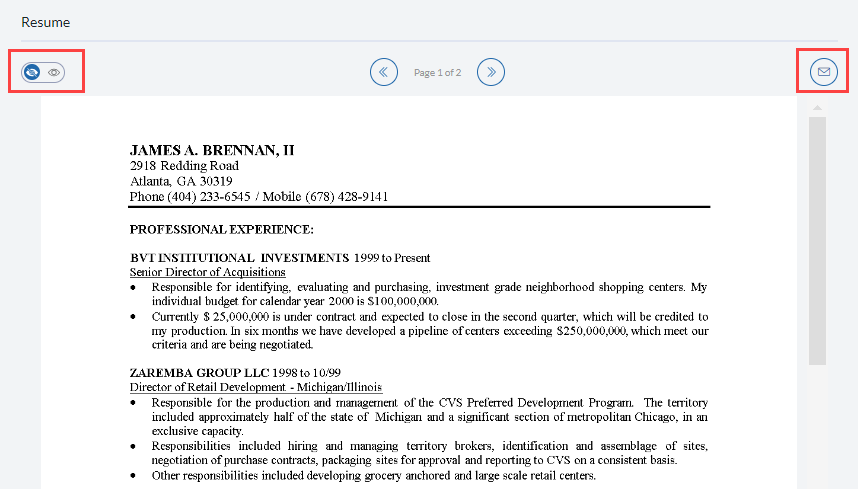
- Resume Frame: Shows a formatted resume from the Name Record with an email icon to send the resume as an attachment via email. Also includes a toggle to switch to a blinded resume.
- Activity Frame: Displays the candidate activities by date. Also has filters for Date, Activity Type, Activity Result, and Username.

- New Attachments Widget: Displays the 10 most recent attachments from the name record and allows the user to drag and drop files into this widget to quickly attach them to the name record.

- Company Field List: Shows selected fields from the Company the Name Record belongs to so that these can be quickly viewed as needed. You cannot edit the fields from here, however, you can click the icon in the top right corner to open the Company record in a new tab. These fields can be reordered and configured to your specific needs. You can also rename the Field List Title to reflect the specific type of field information the widget contains, such as Location or Record Information.

- Pipelines: Shows list of all Position Pipelines that the Name Record is currently attached to as well as their current and past steps. You can interact with this widget by searching, filtering, sorting, adding steps or activities from the plus icon, and edit the previous steps by clicking on that step.

- Interview Frame: Legacy Widget cannot be used.
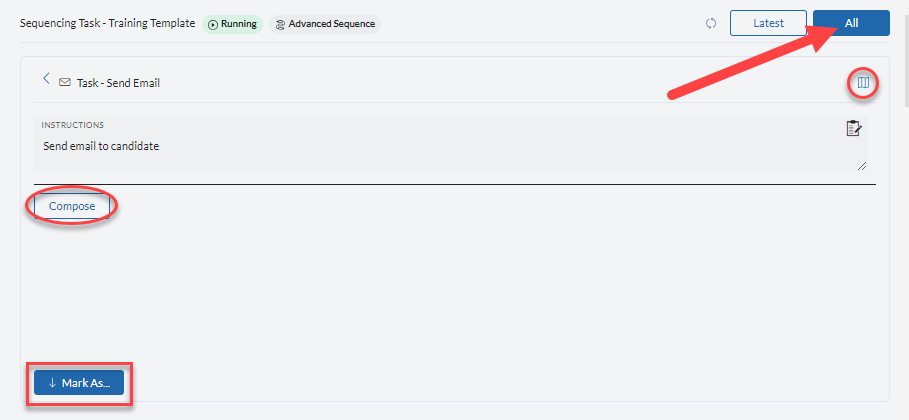
- Sequencing Tasks: Shows the current Sequencing tasks the Name Record is in. This displays both Advanced and Simple Sequences. From here your tasks can be completed and conditions can be selected as well as view the branch map. For Simple Sequences you can also use the Skip Ahead function. By default, you will see the Name Records most recent task but you can also click “All” to view all the Sequence Tasks for the Name record.


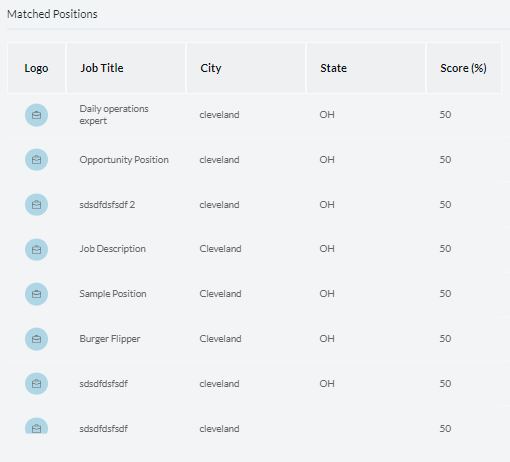
- Matched Positions: Displays Positions that the Name Record may be qualified for based on various criteria such as Job Title. This displays the position and a score based on the amount of criteria matching between the Name and Position Records.
Company Records #
The Workspace tab has a number of different settings and options listed below. These are specific to the Company record tab and this configuration will be shown for all Company records in the database for each user. (Additional layout options coming soon!)
- Empty: This widget adds an empty space to your workspace which allows the user to fill in spaces on the record if desired.
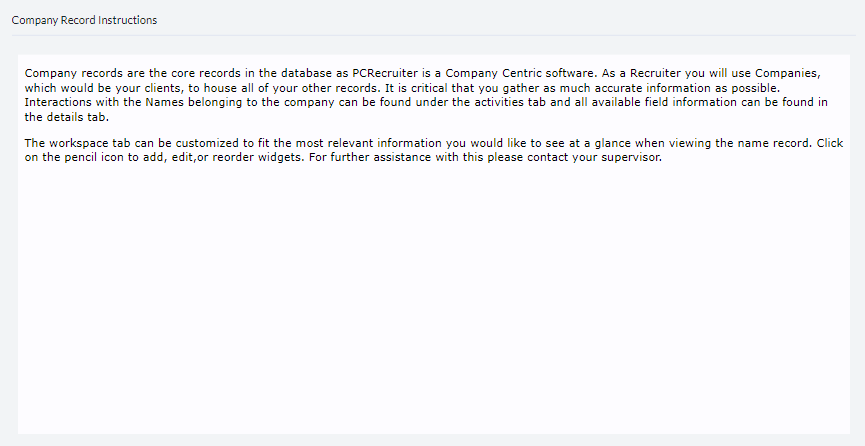
- Text/Instructions: Free text box widget which can be filled in by the user as needed. This can be helpful for giving your new users guidance on utilizing the workspace/record tabs or specific process instructions. (Note that this is different than the notes section, which is individualized for each record and can be found elsewhere in the database. This widget provides specific text to all records of that type and does not show anywhere else but the Workspace tab)
- Company Field List: Shows selected fields from the Company Record so that these can be quickly viewed as needed. These fields can be reordered and configured to your specific needs. You can also rename the Field list Title to reflect the specific type of field information the widget contains, such as Location or Record Information.


- Video: This allows the user to add a video to the workspace tab via embedded URL link. When in edit mode on the Workspace tab, click on the widget’s configure icon and add the link and header to add the desired video. (Please note that the Source Type should not be adjusted as the embedded link is the only supported source type at this time.)


- Related Names: Lists the Name Records assigned to that specific Company.

Position Records #
The Workspace tab has a number of different settings and options listed below. These are specific to the Position record tab and this configuration will be shown for all Position records in the database for each user. (Additional layout options coming soon!)
- Empty: This widget adds an empty space to your workspace which allows the user to fill in spaces on the record if desired.
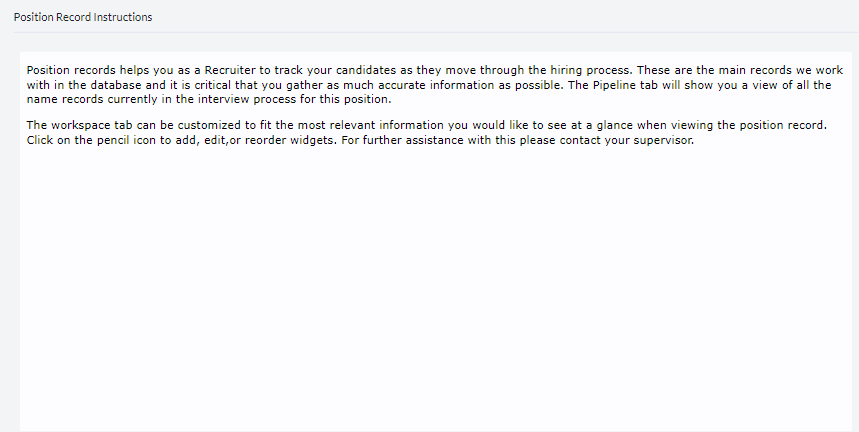
- Text/Instructions: Free text box widget which can be filled in by the user as needed. This can be helpful for giving your new users guidance on utilizing the workspace/record tabs or specific process instructions. (Note that this is different than the notes section, which is individualized for each record and can be found elsewhere in the database. This widget provides specific text to all records of that type and does not show anywhere else but the Workspace tab)
- Position Field List: Shows selected fields from the Position Record so that these can be quickly viewed as needed. These fields can be reordered and configured to your specific needs. You can also rename the Field list Title to reflect the specific type of field information the widget contains, such as Location or Record Information.


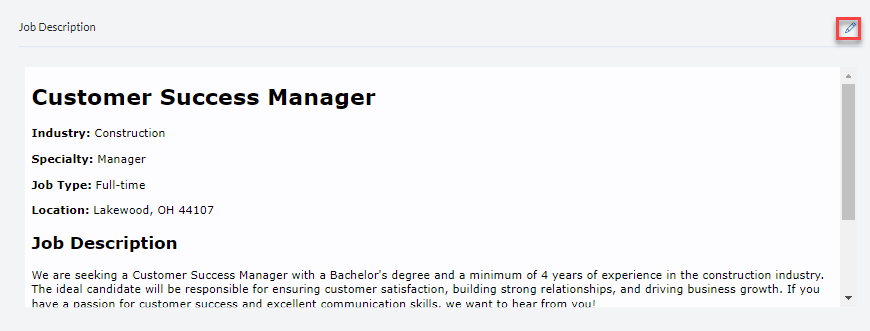
- Job Description: Displays formatted Job Description information. This can be edited from here by clicking the pencil icon in the top right.
- Video: This allows the user to add a video to the workspace tab via embedded URL link. When in edit mode on the Workspace tab, click on the widget’s configure icon and add the link and header to add the desired video. (Please note that the Source Type should not be adjusted as the embedded link is the only supported source type at this time.)


- Names in this Position: Lists the Name Records linked to that specific Position. All these Name Records can be viewed in the Pipeline. This displays Name Record information as well as their Current Pipeline Status and Current Step Date.

Rollups Lists (Coming Soon!) #
Record Field List Widget Customization #
In the Field List Workspace Widget, for all record types, there are several options that can be set. Below is a description for each of these listed by field type. These settings are field specific, so two fields of the same type can have different defaults. Also, each widget contains its own settings, so two of the same field can have different settings on the same Workspace if they are in two different widgets. Each field will have the option to drag to reorder, edit, or delete that field in the upper left corner.

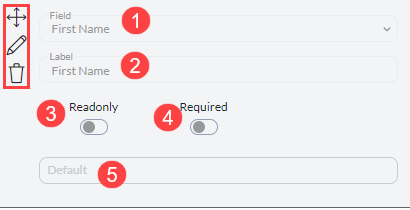
Predefined Fields: These are the fields that were preloaded into the database. These fields all have the same configuration options regardless of their field type. Below are the options and instructions for editing these fields.
- Field: This is the field from your database that the information is being pulled from. Please note that this is the field name that can be found on the details tab.
- Label: Allows user to rename the display name for the field. Be cautious when editing this as it will only apply to this specific widget and does not affect the name in the search/details options, which can cause confusion for some users.
- Read Only Toggle: When enabled, this field cannot be edited by the user, only the values in the field can be seen. (This is not available for the Date Entered/Last Activity/Last Modified fields – these are automatically set to Read Only)
- Required Toggle: When enabled, this field will be required to hold a value or the record cannot be saved.
- Default: Provides a default value into the field when the record is being added or saved. (Coming Soon!)
Custom Fields: These are fields created by the user from the Custom Fields section of the Settings menu. These are listed by field type as they have different settings based on the selected type.
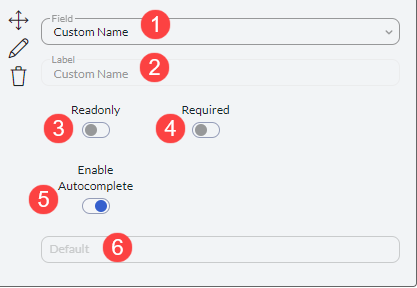
No Action: A plain, single-line field for storing any string of alphanumeric characters.
- Field: This is the field from your database that the information is being pulled from. Please note that this is the field name that can be found on the details tab.
- Label: Allows user to rename the display name for the field. Be cautious when editing this as it will only apply to this specific widget and does not affect the name in the search/details options, which can cause confusion for some users.
- Read Only Toggle: When enabled, this field cannot be edited by the user, only the values in the field can be seen.
- Required Toggle: When enabled, this field will be required to hold a value or the record cannot be saved.
- Enable Autocomplete: Changes the field behavior from a search field to a text field. When turned on the field will search through all values currently existing in the database for that specific field name, if no matching value exists, click “Create…” to add that value to this field on the fly. When turned off this field will act as a basic text field.
- Default: Provides a default value into the field when the record is being added or saved. (Coming Soon!)

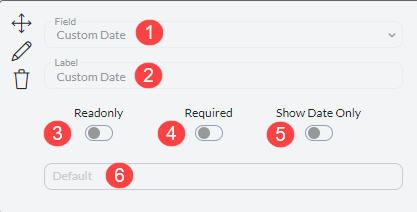
Date: Stores the data entered into the field in Date format, allowing date-based searching.
- Field: This is the field from your database that the information is being pulled from. Please note that this is the field name that can be found on the details tab.
- Label: Allows user to rename the display name for the field. Be cautious when editing this as it will only apply to this specific widget and does not affect the name in the search/details options, which can cause confusion for some users.
- Read Only Toggle: When enabled, this field cannot be edited by the user, only the values in the field can be seen.
- Required Toggle: When enabled, this field will be required to hold a value or the record cannot be saved.
- Show Date Only: Changes the field behavior to display or hide the time. When turned on, the field will only display the date. When turned off, this field will show the date and the time.
- Default: Provides a default value into the field when the record is being added or saved. (Coming Soon!)
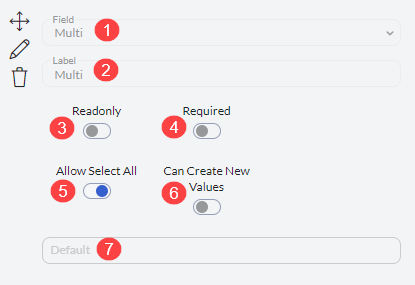
Multi-Select/Multi-Select Checkbox: Allows multiple values to be selected from a predefined list of options.
- Field: This is the field from your database that the information is being pulled from. Please note that this is the field name that can be found on the details tab.
- Label: Allows user to rename the display name for the field. Be cautious when editing this as it will only apply to this specific widget and does not affect the name in the search/details options, which can cause confusion for some users.
- Read Only Toggle: When enabled, this field cannot be edited by the user, only the values in the field can be seen. (This is not available for the Date Entered/Last Activity/Last Modified fields – these are automatically set to Read Only)
- Required Toggle: When enabled, this field will be required to hold a value or the record cannot be saved.
- Allow Select All: This gives the user the select all option when adding in these fields instead of individually clicking each value to add them.
- Can Create New Value: Allows user to add values on the fly to this field. These are not added to the default values set up in the Custom Fields settings menu.
- Default: Provides a default value into the field when the record is being added or saved. (Coming Soon!)
All Other Field Types: All other Custom Field Types will display the following settings.
- Field: This is the field from your database that the information is being pulled from. Please note that this is the field name that can be found on the details tab.
- Label: Allows user to rename the display name for the field. Be cautious when editing this as it will only apply to this specific widget and does not affect the name in the search/details options, which can cause confusion for some users.
- Read Only Toggle: When enabled, this field cannot be edited by the user, only the values in the field can be seen.
- Required Toggle: When enabled, this field will be required to hold a value or the record cannot be saved.
- Default: Provides a default value into the field when the record is being added or saved. (Coming Soon!)

